Taping an ice hockey stick is not just a ritual but a nuanced skill that can significantly impact a player’s on-ice performance.
From achieving the perfect blade coverage to customizing the grip for optimal comfort, the art of taping requires attention to detail.
In this comprehensive guide, we’ll delve into the step-by-step process, offering valuable tips, tricks, and common mistakes to avoid.
Whether you’re a seasoned player looking to refine your technique or a newcomer eager to learn the essentials, this guide will equip you with the knowledge on how to tape an ice hockey stick like a pro.
Get ready to elevate your game with a perfectly taped stick that enhances puck control, shot accuracy, and overall playability. So, stay focused.
Why Taping Matters for Ice Hockey Sticks?
Taping is a critical element in ice hockey stick preparation, significantly impacting a player’s performance on the ice. The primary purpose of taping is to enhance puck control and shooting accuracy.
The right tape job provides players with a tactile feel for the puck, allowing for precise handling and maneuvering during gameplay.
Additionally, the tape’s texture influences the player’s grip on the stick, crucial for maintaining control in high-intensity situations.
Beyond control, taping serves protective and practical functions. It guards the blade from the harsh impact of the puck, preventing premature wear and tear.
Taped sticks also absorb less water, ensuring consistent performance by preventing waterlogged tape during play.
The art of taping is highly personalized, with players customizing their tape jobs to suit individual preferences.
A well-executed tape job is not merely cosmetic; it’s a strategic element that directly contributes to a player’s comfort, control, and effectiveness on the ice.
Tools and Materials Needed for Taping Ice Hockey Sticks
Taping an ice hockey stick is a crucial aspect of a player’s game, influencing puck control, shot accuracy, and overall performance on the ice. To achieve optimal results, it’s essential to use the right tools and materials.
Here are some elaborated points on the tools and materials needed for taping ice hockey sticks:
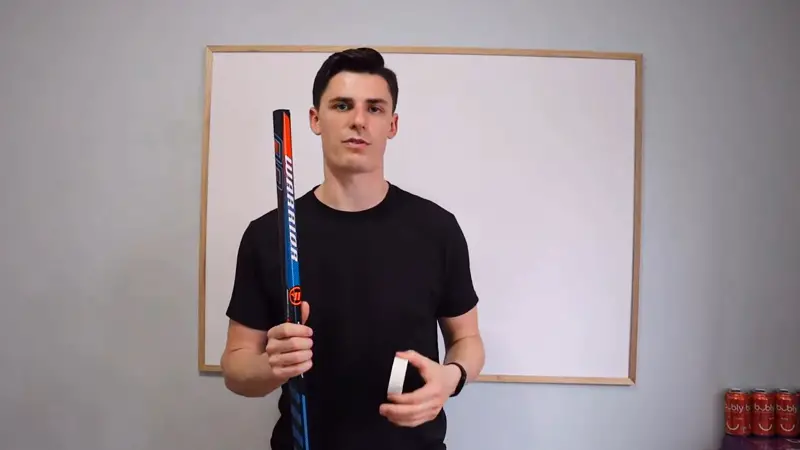
Hockey Tape

The fundamental material for taping a hockey stick is hockey tape. This tape comes in two varieties: cloth and grip.
Cloth tape is durable and provides a smooth surface for puck handling, while grip tape has a textured feel, enhancing the player’s grip on the stick.
Players often use a combination of both for a customized feel that suits their playing style.
Rubber or Cloth Grips
Some players prefer to add an extra layer of grip to the handle of their hockey sticks. Rubber or cloth grips provide a comfortable and non-slip surface for the player’s hands.
These grips come in various thicknesses and textures, allowing players to customize the feel of their stick handles to suit their preferences.
Stick Wax
Stick wax is an often overlooked but valuable tool for hockey players. Applying wax to the taped portion of the stick helps repel water, preventing the tape from becoming waterlogged during play.
Additionally, stick wax adds a layer of tackiness, improving puck control and shot accuracy. Regularly waxing the stick can extend the lifespan of the tape job.
Cloth or Hockey Tape Wrap
For players who want to enhance the durability of their stick blade, wrapping the bottom with an additional layer of cloth or hockey tape is common.
This wrap provides extra protection to the tape, especially in high-wear areas, ensuring that the tape job remains intact for a more extended period.
A well-taped hockey stick contributes significantly to a player’s performance on the ice.
Scissors or Hockey Tape Cutter
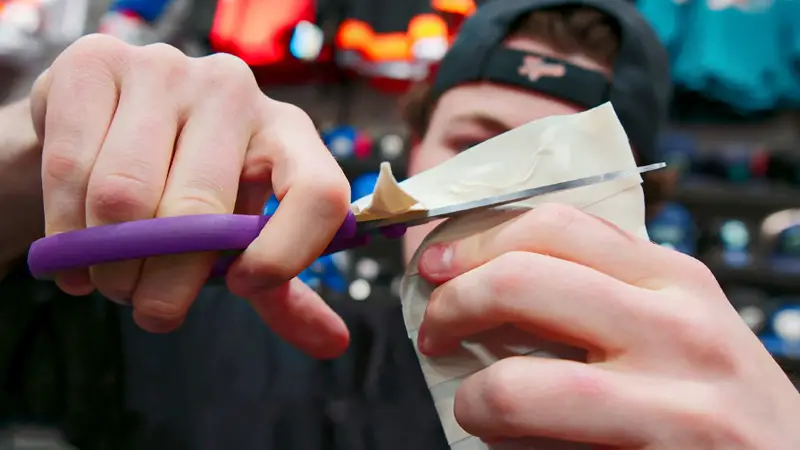
To achieve a neat and effective tape job, a sharp pair of scissors or a specialized hockey tape cutter is essential.
Precision is key when cutting the tape to the desired length, and a clean cut ensures that the tape adheres smoothly to the stick blade and shaft without any jagged edges.
How to Tape an Ice Hockey Stick: Step-by-Step Process
Taping an ice hockey stick is a ritual for players, and a well-executed tape job can significantly impact their game. Here is a step-by-step process to guide you through the art of taping an ice hockey stick:
Prepare the Blade

Start by ensuring the stick blade is clean and dry. Remove any old tape remnants and inspect the blade for damage.
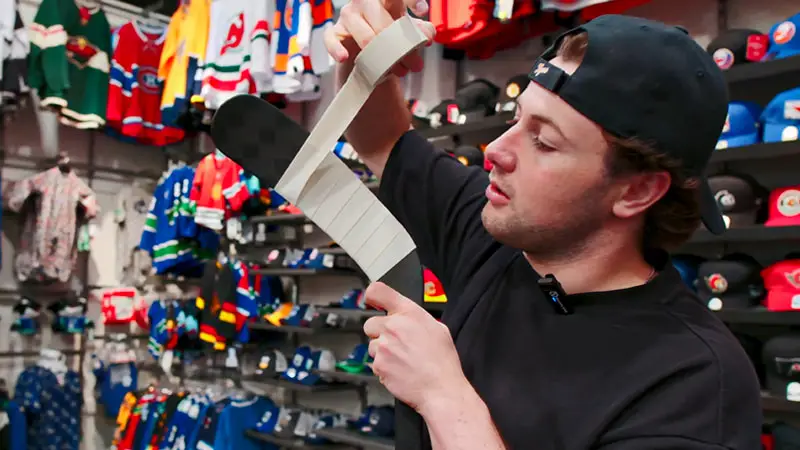
Begin taping at the toe (bottom) of the blade and work your way up towards the heel (top). This ensures a smooth, even tape job that provides consistent puck contact.
Anchor the Tape

Secure the end of the tape at the toe of the blade by wrapping it around once to create a stable anchor. This initial wrap helps prevent the tape from unraveling during play.
Maintain tension on the tape as you proceed to wrap it around the blade, overlapping each turn slightly for complete coverage.
Create a Knob and Grip

Once you reach the top of the blade, form a knob at the end of the stick. This knob serves as a tactile reference point for hand placement. Below the knob, create a grip by wrapping the tape down the shaft.
Customize the grip’s thickness based on personal preference, ensuring it provides comfort and control during play.
Add Personal Touches

Players often add personal touches to their tape jobs. Some choose to include a candy cane pattern for additional grip, while others may use different colored tape for aesthetic appeal.
Experiment with these variations to find a style that suits your playing preferences and distinguishes your stick on the ice.
Apply Stick Wax

Finish the tape job by applying stick wax to the taped portions.
This not only repels water, preventing the tape from becoming waterlogged but also adds a tacky surface for improved puck control. Ensure an even wax application to maximize its effectiveness during gameplay.
By following these steps, you can achieve a well-taped ice hockey stick tailored to your specific needs.
Tips and Tricks for Taping Ice Hockey Sticks
Taping an ice hockey stick is more than just a routine; it’s a skill that can significantly impact a player’s performance on the ice.
Here are some tips and tricks to elevate your taping game and enhance your overall gameplay:
Experiment with Tape Tension
Finding the right balance of tension while wrapping the tape is crucial. Too tight, and it can affect the feel of the puck; too loose, and it may lead to premature unraveling.
Experiment with different tension levels to discover what feels comfortable for your playing style. Consistency in tape tension contributes to a uniform and effective tape job.
Customize Grip Thickness
The thickness of the grip plays a pivotal role in a player’s comfort and control. Experiment with the number of tape layers when forming the grip to find the ideal thickness for your hands.
Some players prefer a thicker grip for added control, while others opt for a thinner grip for a more direct feel of the stick.
Focus on Blade Coverage
Ensure complete coverage of the blade to protect it from puck impacts and ice abrasion. Overlapping each wrap is essential to create a durable and resilient tape job.
Pay particular attention to the toe and heel of the blade, as these areas often experience the most wear during gameplay. A well-covered blade contributes to consistent puck handling and shot accuracy.
Add Wax Strategically
When applying stick wax, focus not only on the blade but also on the grip area. This helps maintain a tacky surface for hand placement, enhancing overall stick control.
Additionally, be mindful of the wax application frequency. Regular waxing is necessary to preserve the tape job and prolong its lifespan.
Rotate and Replace Regularly
Ice hockey sticks endure significant wear and tear. To maintain optimal performance, rotate the stick periodically to distribute the impact evenly.
When the tape job shows signs of wear, such as fraying or loss of adhesiveness, replace it promptly. A fresh tape job ensures consistent gameplay and prevents potential disruptions during crucial moments on the ice.
Incorporating these tips and tricks into your taping routine can elevate your ice hockey stick preparation, providing you with a customized and effective tool for enhanced performance on the ice.
Common Mistakes to Avoid While Taping Ice Hockey Sticks

While taping an ice hockey stick may seem straightforward, common mistakes can compromise the effectiveness of the tape job and, subsequently, a player’s on-ice performance.
Here are some prevalent mistakes to avoid when taping ice hockey sticks:
Uneven Blade Coverage
One common mistake is uneven coverage of the blade. Neglecting the toe or heel of the blade can lead to premature wear and affect puck handling.
Ensure that each wrap of tape overlaps consistently, providing complete coverage and protection across the entire blade surface.
Inadequate Tape Tension
Taping with inconsistent tension can result in a suboptimal grip and feel during gameplay. Too tight can make the stick feel rigid, while too loose may lead to unraveling.
Maintain a steady tape tension throughout the process, paying attention to achieve a balance that feels comfortable and secure for your playing style.
Neglecting Stick Wax Application
Overlooking the application of stick wax is a common mistake. Wax not only repels water but also adds a crucial layer of tackiness for improved puck control.
Ensure an even application of wax on both the blade and the grip area to maximize its benefits. Regular waxing should be part of your stick maintenance routine.
Ignoring Blade Wear Signs
Failing to address signs of wear on the tape job can impact performance. If you notice fraying, loss of adhesiveness, or visible damage, it’s essential to replace the tape promptly.
Ignoring these signs can lead to a compromised grip and diminished control during play, potentially affecting your overall game.
Disregarding Stick Rotation
Players often neglect to rotate their sticks, leading to uneven wear on one side. Regularly rotate your stick to distribute the impact evenly, extending the lifespan of the tape job.
This simple practice ensures that the stick remains in optimal condition for consistent gameplay and prevents the need for frequent retaping.
By avoiding these common mistakes, players can maintain a high-quality tape job on their ice hockey sticks, contributing to better puck control, improved shot accuracy, and an overall enhanced on-ice experience.
FAQs
How often should I change the tape on my hockey stick?
It depends on usage, but a good rule is to change it every 3-5 games or when you notice signs of wear such as fraying. Regularly changing the tape ensures a consistent feel, optimal grip, and effective puck control.
What’s the purpose of using stick wax on taped hockey sticks?
Stick wax repels water, preventing the tape from becoming waterlogged during play.
Additionally, it adds a layer of tackiness, enhancing puck control and shot accuracy. Regular waxing extends the lifespan of the tape job and maintains optimal performance.
Should I use cloth or grip tape for my hockey stick?
It depends on personal preference. Cloth tape is durable and provides a smooth surface, while grip tape has a textured feel for enhanced hand grip.
Many players use a combination of both, with cloth on the blade and grip tape on the handle for a customized feel.
Can I use regular scissors to cut hockey tape?
Yes, regular scissors can be used, but for precision, consider using specialized hockey tape scissors.
These cutters ensure a clean and even cut, preventing jagged edges. A precise cut contributes to a neater tape job and better overall performance on the ice.
Is there a specific way to tape the blade for better performance?
Start at the toe and work towards the heel, overlapping each wrap slightly for complete coverage.
Experiment with tape tension to find a balance that suits your playing style. A well-taped blade enhances puck handling, shot accuracy, and overall control during gameplay.
Wrapping Up
Mastering the art of taping an ice hockey stick is a journey that every player can embark upon to enhance their performance on the ice.
The tape job isn’t just about aesthetics; it’s about achieving a customized feel that aligns with your playing style.
By following the step-by-step process, incorporating valuable tips and tricks, and steering clear of common mistakes, you’ll be well-equipped to tape your stick with precision and purpose.
A well-taped stick contributes not only to better puck control and shot accuracy but also to an overall improved on-ice experience.
So, grab your tape and scissors, experiment with techniques, and get ready to elevate your game with a perfectly taped ice hockey stick. Thank you so much.


James Felix