Ever wonder if your putter grip is holding you back? For many golfers, the grip is the lone point of contact between their hands and the club, making its condition crucial for performance. Yet, even avid players often overlook when it’s time for a replacement.
Replacing your putter grip isn’t just about aesthetics; it’s about maintaining a strong game. Whether you play frequently or only a few times a year, the condition of your grip can significantly impact your performance.
Factors like frequency of play and climate conditions can wear down grips faster than you think. So, how do you know when to replace your putter grip? Should you go by the calendar, or is it better to gauge by the number of rounds played?
Understanding the signs that your grip needs replacing can save you strokes on the green and keep your game sharp.
Materials Needed to Replace a Putter Grip
Replacing a putter grip requires specific tools and substances to ensure a professional outcome. Below are the essential tools and optional tools to enhance efficiency.
Essential Tools for the Job
- Utility Knife
Scraping Tool - Mineral Spirits
- Measuring Device
- Double-Sided Grip Tape
- Masking Tape
- Air Compressor
- Grip Solvent
- Grip Tape Remover
Preparing to Replace the Putter Grip
Replacing a putter grip can be a simple yet effective way to refresh your putting game.
Here’s a step-by-step guide to help you through the process:
Securing the Putter
Properly securing the putter is crucial for effective grip replacement. Place the putter shaft in a vise with protective coverings to prevent damage.
Ensure 2-3 inches of clearance between the vise and the end of the grip. A vertical position with the putter head pointing upwards is ideal.
Next, use a utility knife to carefully cut the old grip lengthwise from top to bottom. Be cautious to avoid damaging the shaft. Once removed, clean the shaft thoroughly to eliminate any residue.
Removing the Old Grip
Use a utility knife to cut the old grip lengthwise without damaging the shaft. Peel off the grip carefully. If resistance is encountered, consider using additional gentle force while maintaining caution to avoid scoring the shaft.
Once the old grip is removed, clean the shaft thoroughly to remove any adhesive residue. Apply double-sided tape evenly along the shaft and moisten it with grip solvent. Carefully slide the new grip onto the taped shaft, ensuring it aligns properly.
Cleaning the Shaft
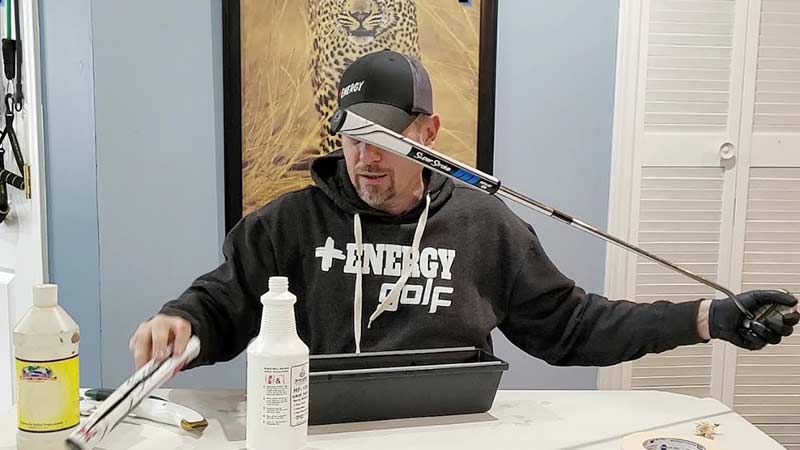
To clean the shaft effectively, first remove the old grip tape using a scraping tool. After scraping, apply mineral spirits to a cloth and wipe the shaft to remove adhesive residue.
Ensure the shaft is completely clean and dry before proceeding to the next step to install the new grip. Next, apply a double-sided grip tape along the length of the shaft, leaving a small overlap at the end.
Pour a generous amount of grip solvent inside the new grip, shaking it to coat the interior. Slide the grip onto the shaft, ensuring it aligns correctly with your putter’s face.
Apply even pressure as you push the grip down, making sure it fits snugly. Finally, let the grip dry for several hours before using your putter to ensure it is securely set.
Installing the New Putter Grip
Proper installation of a putter grip is crucial for maintaining your control and consistency on the green. Follow these steps to ensure a secure and precise fit for your new putter grip.
Aligning the New Grip
Alignment is the first step when installing a new putter grip. Place the new grip next to the putter shaft to determine the proper position. Hold the grip next to the shaft and mark the bottom of the grip with a pencil.
Ensure the clubface is square to your stance to achieve optimal alignment. Once marked, apply double-sided tape along the putter shaft, ensuring it covers the entire area where the grip will sit.
Next, coat the tape with grip solvent to allow smooth installation. Slide the new grip onto the shaft, aligning it with your markings, and ensure it’s positioned correctly before the solvent dries.
Applying the New Grip
After alignment, focus on applying the new grip to the shaft. Insert the club in a vice with protectors to avoid damaging the shaft. Apply liberal amounts of mineral spirits or paint thinner to the inside of the new grip and the re-taped shaft.
Plug the hole at the end of the grip with a finger to keep the solvent from leaking and shake it well. Slide the end of the grip over the shaft quickly and smoothly, making sure it covers the applied tape.
Final Adjustments
Once the grip is on, ensure it is properly aligned. Rotate the grip as needed while the solvent is still wet. Firmly press the end of the grip with the palm of your hand to secure it.
Allow the grip to set and dry completely, usually for at least several hours. This step solidifies the grip’s position and ensures long-term adherence.
Once the grip is on, ensure it is properly aligned. Rotate the grip as needed while the solvent is still wet. Firmly press the end of the grip with the palm of your hand to secure it. Allow the grip to set and dry completely, usually for at least several hours.
This step solidifies the grip’s position and ensures long-term adherence. Finally, check for any misalignment and make minor adjustments if necessary. Now, your putter is ready for action with its new, secure grip.
Troubleshooting Common Issues
Installing a new putter grip can sometimes present challenges. Here are solutions to two common issues.
Solving Alignment Problems
Incorrect grip alignment affects putting performance. Check alignment by visually inspecting the grip in relation to the clubhead. If it seems off, remove the grip immediately before the adhesive sets.
Reapply mineral spirits to keep it moist, then realign the grip using the flat edge on top of the putter shaft as a guide. A grip alignment tool can aid in achieving precision.
Allow the grip to set for at least 24 hours before use to ensure proper adhesion. Regularly inspect your putter grip for wear and tear, as maintaining a consistent grip is crucial for optimal performance.
Addressing Adhesive Failures
Grip slippage occurs due to adhesive failure. This often happens if the double-sided tape or mineral spirits are not applied properly.
Ensure 11.5 inches of double-sided tape is wrapped smoothly around the shaft and a half-inch overhang is tucked into the shaft.
Generously coat the interior of the grip with mineral spirits and shake well to distribute evenly. If the grip still slips, consider re-taping the shaft and reapplying the mineral spirits for a better bond.
Additionally, allow the grip sufficient time to dry and set before its first use, typically between 24 to 48 hours. Proper drying ensures a secure fit and optimum performance on the green.
Caring for Your New Putter Grip
Proper care extends the lifespan and maintains the performance of your new putter grip.
Regular Maintenance Tips
Keep your putter grip clean to maintain its tackiness and effectiveness. Wipe the grip with a damp cloth after each round of golf. For deeper cleaning, use mild soap and water.
Avoid harsh chemicals as they can deteriorate the grip material. Dry the grip thoroughly with a clean towel before storing it.
Store your putter in a cool, dry place to prevent exposure to extreme temperatures or moisture. Rotate your grip position periodically if you notice wear on specific areas.
When to Consider Re-Gripping Again
Check your putter grip regularly for signs of wear such as cracking, hardening, or loss of tackiness. Replace the grip if your hands slip during the stroke, as this can affect performance.
High-frequency golfers should inspect their putters more often and consider re-gripping every 6 to 12 months. In humid or rainy climates, grips may wear faster due to increased exposure to moisture.
Additionally, ensure you choose the right grip size and material to match your playing style for optimal control and feel. Quality tools and proper installation techniques will also contribute to the longevity of the grip.
Frequently Asked Questions
Can I clean my putter grip instead of replacing it?
Yes, you can extend the life of your putter grip by cleaning it regularly with mild soap and water. Avoid harsh chemicals as they can damage the grip material.
How do I maintain a new putter grip?
Maintain a new putter grip by regularly cleaning it with mild soap and water, avoiding extreme temperatures, and storing the putter in a cool, dry place.
What are the benefits of replacing a worn putter grip?
Replacing a worn putter grip improves control, comfort, and overall performance on the green. It ensures a better connection with your club, leading to more accurate putts.
Can I regrip a putter at home without professional help?
Yes, you can regrip a putter at home using basic tools and following a step-by-step process. Many golfers find it a straightforward DIY task.
Conclusion
Taking care of your putter grip is essential for maintaining your performance on the green. Regular maintenance and timely replacement can make a significant difference in your game.
Remember to clean your grip with mild soap and water avoid harsh chemicals and store your putter properly. By paying attention to wear signs and re-gripping as needed you’ll keep your putter in optimal condition.
Follow these guidelines and enjoy a more consistent and effective putting experience. Choosing the right grip when it’s time for replacement is equally important.
Consider factors such as texture, size, and material to match your personal preference and playing style. A properly fitted grip can enhance your control and confidence, leading to better results on the course.
Colin McCarthy