If you’ve ever struggled with a poor golf grip, you can easily replace it yourself without needing a vise. All you need are a utility knife, double-sided grip tape, and grip solvent.
First, remove the old grip with the knife, apply the tape to the shaft, and then use the solvent to slide the new grip on smoothly. Once it’s dry, your clubs will feel brand new and ready for your next game.
It’s crucial to ensure that the grip aligns correctly with the club’s face to maintain performance. Regularly changing grips can improve your consistency and control, enhancing your overall game.
Not only does this process save you time and money, but it also allows you to tailor your equipment to your preferences. Always remember to let the grip fully dry before use, ensuring optimal adherence.
The Supplies You Will Need
To change your golf grips without a vise, gather new grips, a utility knife with a hook blade, double-sided grip tape, grip solvent, a spray bottle, paper towels or rags, and optionally a rubber shaft clamp.
Work in a well-ventilated area and have all supplies ready. Cut off the old grips carefully, clean off any tape residue with grip solvent, apply double-sided tape on the shaft, and then apply grip solvent inside the new grip and over the tape.
Slide the new grip onto the shaft, align it properly, wipe any excess solvent, and let it dry completely before using the club.
How to Change Golf Grips Without Vise
Changing golf grips without a vise is straightforward. Follow these steps to ensure your clubs are as good as new.
Step 1: Remove Your Old Grips
Start by using a utility knife with a hook blade to cut down the length of the old grip without damaging the shaft. Peel off the grip carefully, especially around stubborn edges. Remove any tape residue from the shaft using rubbing alcohol.
Apply new double-sided grip tape, extending beyond the grip’s length. Pour grip solvent inside the new grip and over the taped shaft. Slide the new grip onto the shaft, aligning it properly.
Step 2: Remove Tape
Once the grip is off, focus on the old tape. Use the same utility knife to scrape off the tape, applying gentle pressure to avoid scratching the shaft. Wipe the shaft clean with a paper towel or rag to remove any remaining adhesive.
Next, apply double-sided tape evenly along the shaft. Make sure to smooth out any wrinkles or bubbles. Then, apply a small amount of grip solvent to the tape. This will make it easier to slide the new grip into place without a vise.
Step 3: Apply the New Tape
Apply double-sided grip tape to the shaft. Align the tape with the shaft’s top and wrap it smoothly, ensuring no wrinkles. Peel off the tape’s backing to expose the adhesive.
Next, apply a generous amount of grip solvent to both the tape and the inside of the new grip. Slide the grip onto the shaft, twisting slightly to ensure even distribution.
Step 4: Applying the Grip
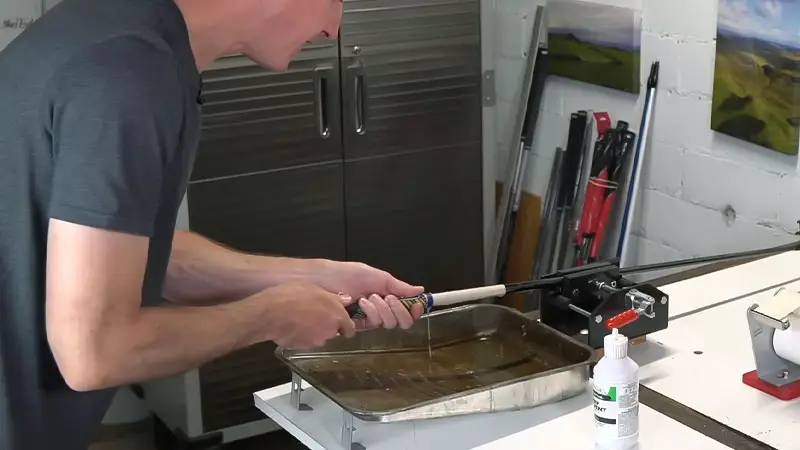
Next, spray the inside of the new grip with grip solvent. Cover the tape on the shaft with the same solvent. Quickly slide the grip onto the shaft, aligning it before the solvent sets.
Twist and push to ensure it’s securely in place. Allow the grip to dry for several hours before using the club. This ensures the grip adheres properly. Recheck the alignment to make sure everything is straight before hitting the course.
Step 5: Clean Up and Let it Set
Finally, clean any excess solvent from the club. Use a rag to wipe down the grip and shaft. Allow the grip to set for at least an hour in a well-ventilated area before use.
This helps ensure the grip adheres properly and provides optimal performance on the course. Regular maintenance of your golf grips can significantly enhance your game and increase the lifespan of your clubs.
Regripping Golf Clubs at Home – Should You Even Do It?
Regripping golf clubs at home offers benefits such as cost savings, convenience, and control over quality. However, challenges include the risk of misalignment and the need for specific materials like new grips, double-sided tape, grip solvent, and a utility knife.
Proper ventilation is essential due to solvent fumes. Despite these challenges, regripping your clubs can be empowering and foster a deeper connection with your equipment.
The steps include gathering necessary tools, removing the old grip, applying new tape, and sliding on the new grip using solvent. Finally, let the club sit for several hours to ensure the grip is set firmly.
Final Adjustments and Drying
Check the alignment of the new grip and adjust if necessary to ensure it’s straight. Inspect and remove any air bubbles by gently twisting the grip.
Once aligned, set the club aside to dry completely, usually 12 to 24 hours depending on the solvent used. Store the club in a dry, cool place, avoiding direct sunlight or extreme temperatures.
After drying, perform a final inspection to ensure the grip is secure and properly aligned before use. Regularly check your grips for signs of wear and tear to maintain optimal performance.
Replacing them as needed can significantly improve your control and comfort on the course. Happy golfing!
Frequently Asked Questions
How often should golf grips be replaced?
Typically, golf grips should be replaced once a year or every 40 rounds of golf, depending on usage and personal preference. Regular checks help ensure optimal performance.
Can you change golf grips without a vise?
Yes, changing golf grips without a vise is possible. Key steps include applying grip solvent generously to the new grip’s interior and ensuring proper alignment when installing.
What tools are needed to regrip golf clubs at home?
Essential tools include new grips, double-sided grip tape, grip solvent, a utility knife (for removing old grips), and paper towels. Optional tools include a vise and shaft clamps for ease.
How do you remove old golf grips?
To remove old golf grips, cut them lengthwise with a utility knife and peel them off. Remove old grip tape by scraping with a sharp tool and clean the shaft with solvent.
Why is grip solvent important during regripping?
Grip solvent helps activate the adhesive on double-sided tape, allowing the new grip to slide on easily and set properly once the solvent dries.
Conclusion
Changing your golf grips without a vise is entirely feasible with the right approach and tools, allowing you to refresh your clubs and enhance your game without professional assistance.
Embrace the DIY process to save money and gain a personalized touch for your equipment. Gather essential tools such as a utility knife, grip tape, and solvent.
Start by cutting away the old grip, then apply new tape and use solvent to slide on the new grip. Ensure proper alignment and let it dry completely before use.
With practice, you’ll master this skill and enjoy the benefits of well-maintained golf clubs. Remember to work in a clean, well-ventilated area to avoid inhaling fumes from the solvent.
Regularly changing your grips provides better control and comfort, improving your overall performance on the course.


Colin McCarthy